Introduction
Screenshout is a browser based image editor. The main use-case is for editing and annotating screenshots but it works with any jpg or png image. See the gallery for an idea of what is possible.
One remarkable thing about Screenshout is that it is completely browser-based for Chrome, Firefox, and IE Edge users. If you are using Safari or IE 10/11, Screenshout uses a web service to render the final image when you click the save button.
Getting started with the Standalone editor
This section is specifically for the free-to-use standalone web editor.
All platforms support using the Open button in the editor to load an image from the filesystem. Most other platforms support capturing an image directly from the desktop then pasting into the editor
- OS X - You can launch the screen capture tool by pressing Ctrl+Cmd+Shift+4. You can then capture a region of your screen then use Cmd+V to paste it into the Screenshout editor open in your browser
- Windows - Most keyboards will have a Print Screen button in the upper right. Pressing this will capture the current screen. You can then paste this into the Screenshout editor using Ctrl + V. You can then use the crop tool.
- Linux - Not sure about this one. Most likely, it works the same as Windows. If not someone email me and let me know ryanackley@gmail.com
- ChromeOS - You can capture a screenshot using Ctrl +
 . Then paste it into the editor using Ctrl + V
Resizing the image
After launching, the screenshout editor should have your image loaded in the center. Depending on the size and resolution of the image, it will probably be shrunk to fit into a proportion of the workspace. You can easily resize the image by selecting it and using the corner handles to change it's dimensions.
Tools
Callout
This allows you to label or "call out" a part of an image using a pointer with a text box attached to it. To add a callout click the callout button in the tools menu then click any part of the image.
There are several pointer and line styles for callouts.
Magnify
This adds a circle that magnifies a piece of the underlying image. The max magnification is the original image size. The idea being that you can shrink the main image and emphasize interesting areas using this tool.
To add a magnify circle, click on the magnify tool, then click on the image.
Text
Use the text tool to add a textbox to your image. You can then edit the text and style it. Screenshout uses Google Fonts exclusively for typefaces.
To add a textbox, click on the text tool, then click anywhere in the workspace.
Box
This adds a box to the image.
To add a box, click on the box tool, then click on the image.
Crop
This allows you to crop the image. When you click on this tool the editor enters into Crop mode. Use the handles on the image to select the area you want to keep. You can use the arrow keys on the keyboard to fine tune the movement of a selected handle.
Border
Use the Border tool to add simple border effects to the image. Currently supported effects are Drop Shadow, Fade to Background, and a Rounded Border.
Getting started with the Screenshout Confluence plugin
This section is specifically for the Confluence plugin. Besides some Confluence-specific integration pieces, it's functionality is identical to the free-to-use standalone web editor. You can evaluate and install it into Confluence from the Atlassian Marketplace
Screenshout adds a self-titled macro to the Confluence editor. The easiest way to insert a new Screenshout image is to start typing {Screenshout in the Confluence editor. This should present you with an autocomplete dropdown with the Screenshout macro as a choice. Select this choice to get started.

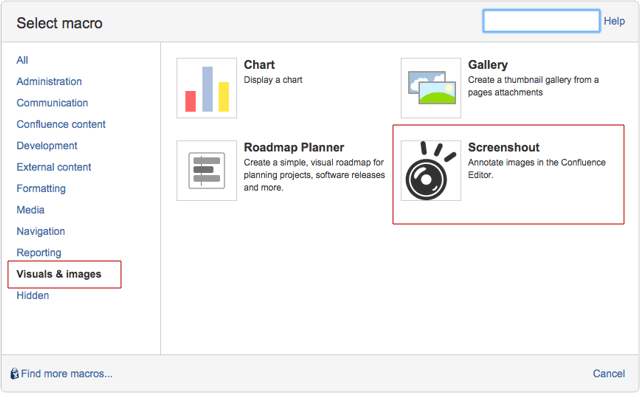
Alternatively, you can insert a new Screenshout macro by opening the macro browser and searching for Screenshout or navigating to it under the Visuals and Images category.
Screenshout Dialog
Once you click on Screenshout in the Macro Autocomplete or the Macro browser, the Screenshout dialog will appear.
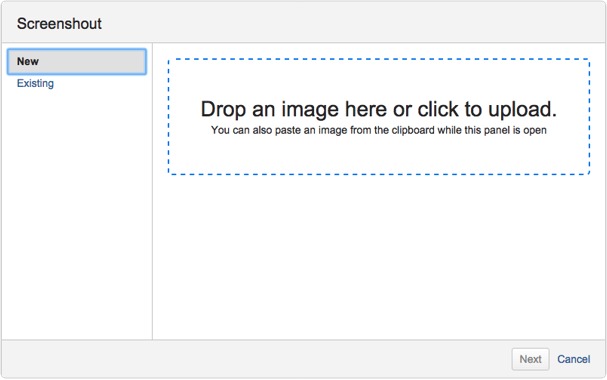
There are 3 ways to insert an image into the dialog.
- Click on the drop zone to launch a file select dialog then select a file from your hard drive.
- Drag and drop an image file onto the drop zone
- Paste an image from your clipboard. (Note that Safari doesn't support this).
After getting an image into the dialog. Click the Next button and the Screenshout editor will launch.
Screenshout Editor
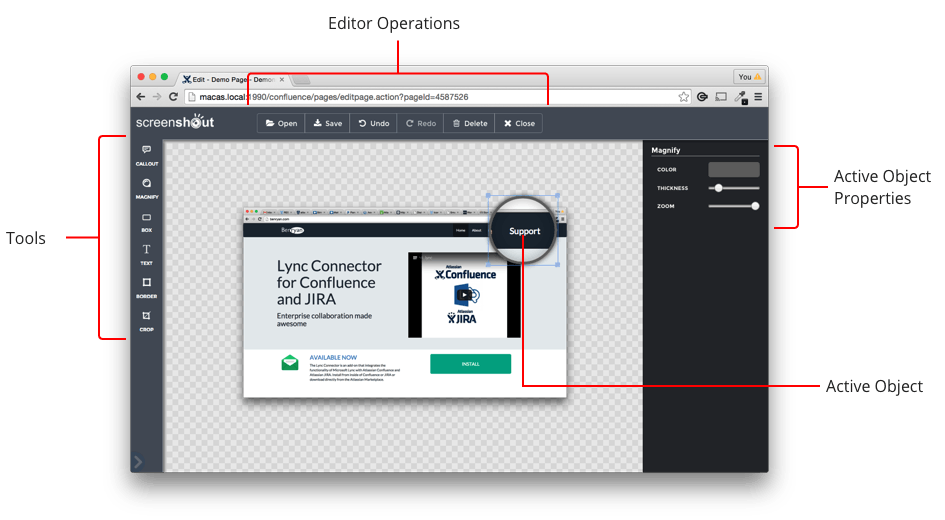
- Tools - Use these to edit the image
- Editor Operations - General edit operations like Open, Save, Undo, Redo, etc.
- Active Object - When you click on an object, it becomes active. You can move and resize it and edit its properties.
- Active Object Properties - When an object is selected, its properties will appear in the right sidebar. Edit object properties here.